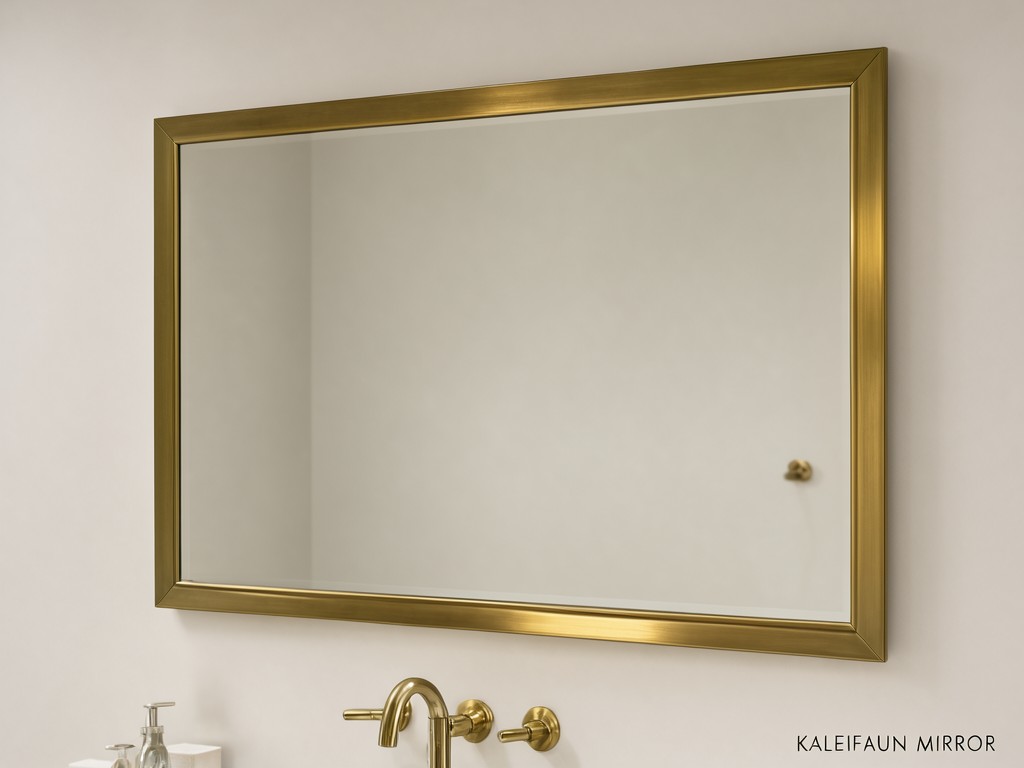
Bespoke brass rectangular bathroom wall mirror - Bulk Supply and Specification Guide
Consistency is set at the forming stage: a small change in frame profile or corner angle can leave the mirror sitting unevenly against the wall. A polished sample may hide that variation until several units are installed side by side. For a second source, approve the frame section, joint treatment and glass edge detail together.
The main return complaints are black marks at the mirror edge, finish changes near a joint, and mounting points that do not match the installer’s layout. Each has a different cause; one general “brass finish” description will not control all three.
Material Options and Their Trade-offs
Solid brass frame parts cost more than brass-finished steel, but they avoid exposed steel at cut edges and allow the frame to be refinished after fabrication. Brass-finished steel can reduce initial material cost; damage to its plated or coated surface may expose the base metal to bathroom moisture. Choose by the expected service environment and the buyer’s repair policy, not by colour sample alone.
- Solid brass is suited to a frame specification that calls for a real metal substrate and a defined brushed, polished or lacquered appearance.
- Brass-finished stainless steel can be considered where the finish is the priority and the supplier confirms the substrate, coating system and repair limits.
- Mirror glass can be specified with a protected backing and sealed edges. Copper-free mirror options are available; edge protection and installation conditions still matter.
Bathroom exposure rule: specify the frame substrate, surface treatment and mirror-edge protection as separate line items. A brass-colour match does not confirm material or moisture resistance.
Construction Method and Its Effect on Consistency
First-article tooling determines whether the four frame sides meet evenly and whether the finished rectangle stays square. A typical build uses cut and formed brass sections, joined at the corners, dressed to remove visible joint marks, then finished before the mirror is fitted. Changes to section depth or corner construction can alter both the appearance and the frame’s stiffness.
Frame profile
Lock the visible face width and projection from the wall. Those dimensions affect both the look and the space available for the glass and mounting hardware.
Corner joint
Mitered joints need consistent cuts and careful dressing. A joint that is over-polished can leave a visible low spot or a change in sheen.
Glass support
Larger glass panels need support suited to their size and installation orientation. Poor support can produce movement or a distorted reflection.
Edge protection
Keep the mirror edge clear of trapped moisture and direct contact with the frame. A sealed, protected edge lowers the risk of dark edge marks.
Approve a first article at the intended size before releasing repeat production. For dimensional agreement, record the outside width and height, diagonals, frame projection, glass position and mounting-point locations on the approved drawing.
Comparing Two Standard Configurations
The main cost decision is whether to keep the metal treatment simple or add a protective clear coat. Both can deliver a brass appearance, but they age differently and have different repair expectations.
Unlacquered Brass
The surface can develop patina and may need routine polishing. Select it where natural tone change is acceptable and the product can be maintained after installation.
This option avoids a clear-coat wear line, but it will not hold a fixed colour indefinitely.
Lacquered Brass
A clear coat slows direct contact with the brass and helps preserve the approved appearance. Abrasion or harsh cleaners can damage the coating, so care instructions must match the finish.
Choose it when closer colour retention matters more than local refinishing.
Buying Mistakes That Lead to Returns
A finish name by itself is not a production specification. “Brushed brass” can vary in tone, grain direction and reflectivity between suppliers or batches; approve a physical sample and define which surfaces are visible after installation.
- If the wall fixing positions are not on the approved drawing, installers may need new holes or an unsafe workaround. Confirm the mounting layout before bulk release.
- A glass thickness change can alter the rebate fit and finished weight. Confirm glass thickness and frame clearance as a matched set.
- A clear coat is not a substitute for correct cleaning advice. Abrasive pads and aggressive bathroom cleaners can mark the finish.
- Large mirrors can arrive with corner damage when packaging only protects the face. Specify edge and corner protection, plus a handling mark for the carton.
Customisation Options and Their Limits
First-article tooling determines which dimensions can change without a new forming setup. The reference ranges below are planning guidance, not a substitute for a size-specific drawing; weight depends on the glass area, frame profile and mounting hardware.
| Specification | Planning Range or Option | Buyer Check |
|---|---|---|
| Overall size | Common project sizes fall around 400–1200 mm wide and 600–1800 mm high; confirm the buildable range with the factory. | State outside dimensions and agreed tolerances on the drawing. |
| Mirror glass | Typically 4–6 mm, subject to panel size, support and frame clearance. | Approve glass type, edge finish and backing protection together. |
| Frame material | Solid brass or a confirmed brass-finished metal substrate; profile and gauge are project-specific. | Do not approve on colour alone. Record the substrate and surface treatment. |
| Finished weight | Quoted by finished size and construction; no single weight applies across the range. | Use the confirmed unit weight to select wall fixings and plan carton handling. |
| Mounting and branding | Fixing layout, backing detail, label and carton artwork can be specified. | Supply final artwork and fixing coordinates before sample approval. |
Non-standard dimensions may require a new jig or forming tool and can add setup cost. Keep the frame profile and corner method fixed across size variations where possible; this simplifies inspection and reduces avoidable changes at reorder.
How Consistency Is Held Across Batches
Batch control starts with a signed reference sample and a drawing that identifies measurable points. The factory can then compare new production against the same dimensions, finish sample and assembly details rather than relying on a general colour description.
Useful inspection points: outside dimensions and diagonals, frame projection, corner alignment, mounting locations, glass position, visible joint marks, finish tone against the approved sample, and glass condition. Agree inspection frequency and acceptance limits before the first production order.
A second source should receive the same revision-controlled drawing, material description and finish reference as the incumbent supplier. Keep approval records by batch or purchase order, especially when the finish is hand-brushed or the brass is left unlacquered.
Packing, Marking and Freight Configuration
Mirror returns often start with corner impact or movement inside the carton, not with a manufacturing defect. Use face protection that will not abrade the finish, isolate the corners, and prevent the unit from shifting during handling. Packaging should be reviewed against the actual mirror dimensions and shipment route.
Protection and pack-out
Specify face film or another non-marking separator, corner guards, and a carton structure matched to the unit’s weight. For multi-unit cartons, separate each mirror and prevent frame-to-glass contact.
Carton information
Confirm orientation and handling marks, SKU or model reference, quantity, and any destination-market retail label. Agree carton dimensions and pallet configuration before the freight booking.
Setup, Use and Replacement Parts
Install with fixings suited to the wall substrate and the confirmed finished weight; the mirror supplier cannot determine the fixing capacity of an unknown wall. Keep the frame level and use the specified mounting points. Avoid trapped water behind the mirror and wipe away splashes rather than letting cleaner run into joints or edges.
For lacquered brass, use a soft cloth and a cleaner approved for the coating. Do not use abrasive pads. Unlacquered brass may be polished to change or refresh its patina, but polishing frequency depends on room conditions and the owner’s preferred appearance.
For repeat orders, retain the approved finish reference and ask whether matching frame parts, mounting hardware or a replacement glass panel can be supplied separately. Parts availability depends on the original construction and the time elapsed since the production run.
Finish and Colour Options
Finish naming varies between factories, so compare physical samples under consistent lighting. Record the finish process and visible surface direction, then define how much batch-to-sample variation is acceptable.
| Finish option | Appearance and upkeep | Approval point |
|---|---|---|
| Brushed brass | Directional grain; visible marks may vary with brushing and handling. | Set grain direction and approve a sample that includes a corner joint. |
| Polished brass | More reflective; polishing can reveal small surface differences. | Check reflection, tone and joint appearance on the finished frame. |
| Antique or patinated brass | Tone and shading may be intentionally varied across the surface. | Agree a sample range; avoid describing a deliberately varied finish as a uniform colour. |
| Clear-coated brass | Coated surface with care limits; coating damage may require specialist repair. | Confirm coating appearance, touch-up policy and approved cleaning method. |
Review a Quotation Against the Approved Build
For a second-source quotation, send the target dimensions, glass specification, frame substrate and profile, finish sample or reference, mounting layout, packing requirement and forecast order quantity. Ask the supplier to identify tooling charges, sample timing, batch inspection points and any assumptions that differ from the current specification.
Request a quotation review with your drawing and current sample details so the comparison covers construction and landed packing requirements, not finish name alone.